How to Prevent Paver Shifting: Professional Hardscaping Methods That Deliver Long-Term Results
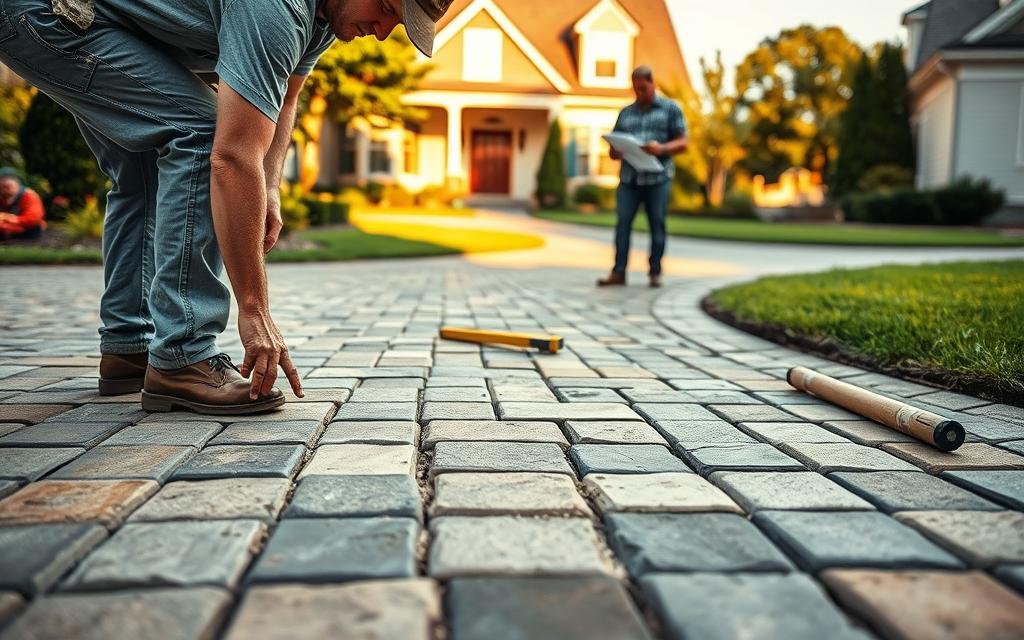
Paver shifting is one of the most common issues homeowners experience after installing patios, walkways, or driveways. Uneven surfaces, sunken corners, and widening joints not only diminish the appearance of your outdoor space but can also create safety hazards and costly repair needs. For homeowners investing in quality hardscaping, preventing paver shifting is essential to protecting both the beauty and longevity of the project.
At a professional level, preventing paver movement is not about quick fixes—it’s about proper planning, precise installation, and the use of proven materials and techniques. As experienced hardscaping contractors, we understand how soil conditions, drainage, load requirements, and material selection all work together to ensure a stable, long-lasting paver installation.
This guide explains, step by step, how professional hardscaping companies prevent paver shifting and why expert installation makes a critical difference in performance and durability.
Why Paver Shifting Happens—and Why Professional Installation Matters
Paver shifting rarely happens by accident. In nearly every case, movement occurs because foundational steps were rushed, skipped, or improperly executed. While pavers themselves are designed to be durable, their performance depends entirely on what lies beneath the surface.
When installed correctly, pavers—whether standard concrete, 24×24 concrete pavers, or porcelain pavers—can last decades with minimal maintenance. When installed incorrectly, even premium materials can fail prematurely.
Professional hardscaping services focus on eliminating these risks from the start.
What Causes Pavers to Shift?
Understanding the causes of paver movement highlights why professional hardscaping installation is so important.
Inadequate Base Preparation
The most common cause of shifting is a weak or improperly constructed base. Without a stable foundation, pavers settle unevenly under use and weather conditions.
Insufficient Excavation Depth
Shallow excavation limits the thickness of the base layer, reducing load distribution—especially critical for driveways and large-format pavers.
Poor Compaction
Uncompacted or inconsistently compacted base material settles over time, leading to sinking and uneven surfaces.
Missing or Weak Edge Restraints
Without proper edge restraints, pavers gradually move outward, causing joint failure and misalignment.
Drainage Problems
Water undermines the base by washing away fine materials, creating voids beneath the pavers.
Freeze-Thaw Cycles and Soil Expansion
In colder climates, moisture expansion and contraction place stress on poorly installed paver systems.
Step 1: Strategic Planning for a Stable Paver Installation
Professional paver installation begins with detailed planning.
Site Evaluation and Load Assessment
Hardscaping contractors evaluate how the space will be used—foot traffic, furniture weight, or vehicle loads—all of which determine base depth and material selection.
Soil Analysis and Ground Conditions
Clay-heavy soils, sandy soils, and mixed substrates behave differently. Understanding these conditions allows professionals to design a base that resists movement.
Layout Design and Drainage Planning
Proper slope is engineered into the design to direct water away from structures and prevent pooling beneath the pavers.
Material Selection
Large-format options like 24×24 concrete pavers or porcelain pavers require additional precision and support, which professionals account for during planning.
Step 2: Excavation to Professional Standards
Excavation depth is one of the most critical factors in preventing paver shifting.
Proper Excavation Depth by Application
- Walkways and patios: typically 6–8 inches
- Driveways or high-load areas: 10–14 inches or more
- Porcelain and large-format pavers may require reinforced systems
Removal of Unstable Materials
All organic material, roots, and loose soil are removed to prevent future settling.
Precision Grading
Professional excavation ensures a consistent depth and slope across the entire project area, reducing weak points.
Step 3: Constructing a High-Performance Paver Base
The base layer is the backbone of any paver installation.
Professional Base Materials
Crushed stone with angular edges is used because it compacts tightly and resists movement—unlike rounded gravel.
Layered Installation
Base material is installed in multiple compacted lifts, ensuring uniform density throughout.
Load Distribution
A properly constructed base spreads weight evenly, preventing localized settling and shifting.
Step 4: Expert Compaction Techniques
Compaction transforms loose aggregate into a solid, load-bearing foundation.
Commercial-Grade Compaction Equipment
Professional hardscaping contractors use vibratory plate compactors calibrated for different base depths and materials.
Multi-Layer Compaction
Each layer is compacted individually to eliminate voids and weak spots.
Quality Control
Base stability and level are checked continuously to ensure long-term performance.
Step 5: Precision Bedding Layer Installation
The bedding layer allows pavers to sit evenly while accommodating minor adjustments.
Proper Sand Selection
Professionals use concrete or bedding sand specifically designed for paver systems.
Screeding for Consistency
A uniform bedding layer—typically one inch thick—ensures each paver sits level.
Avoiding Over-Compaction
The bedding layer remains loose until pavers are installed to maintain flexibility.
Step 6: Professional Paver Placement
Careful placement ensures alignment, stability, and aesthetics.
Controlled Starting Points
Installations begin from fixed edges to maintain straight lines.
Consistent Joint Spacing
Uniform joints are essential for proper interlock and joint sand performance.
Precision Cutting
Edges and transitions are cut cleanly to prevent future movement along borders.
Step 7: Installing Heavy-Duty Edge Restraints
Edge restraints are a non-negotiable component of professional installations.
Purpose of Edge Restraints
They prevent lateral movement and maintain the integrity of the entire surface.
Professional-Grade Options
- Commercial plastic restraints
- Aluminum or steel edging
- Concrete edge restraints for high-load areas
Secure Anchoring
Restraints are anchored deep into the base to withstand long-term pressure.
Step 8: Locking Pavers With Joint Sand
Joint stabilization is key to preventing individual paver movement.
Polymeric Sand for Pavers
Professionals strongly recommend polymeric sand for pavers. Once activated, it hardens to lock pavers together while resisting weeds and erosion.
Proper Application
Sand is swept into joints, compacted, and re-filled to ensure complete coverage.
Controlled Activation
Water is applied carefully to activate the polymeric binders without washing out the joints.
Step 9: Engineered Drainage Solutions
Drainage is a leading factor in paver longevity.
Proper Surface Slope
Professional designs direct water away from buildings and high-use areas.
Subsurface Drainage
In areas with poor drainage, systems such as French drains or permeable bases are installed.
Preventing Water Infiltration
Well-designed drainage protects the base from erosion and freeze-thaw damage.
Step 10: Final Compaction and Quality Inspection
The final phase ensures the entire system is locked in place.
Surface Compaction
A protective pad is used during final compaction to prevent paver damage.
Alignment and Level Checks
Minor adjustments are corrected before the project is finalized.
Final Joint Sand Application
Joints are topped off to ensure complete stabilization.
Ongoing Maintenance for Long-Term Stability
Even professionally installed pavers benefit from routine care.
- Periodic inspection of joints
- Reapplication of joint sand as needed
- Monitoring drainage performance
- Prompt correction of minor settling
Regular maintenance protects your investment and extends its lifespan.
Common Installation Mistakes Homeowners Should Avoid
Professional hardscaping companies often repair projects affected by:
- Insufficient base depth
- Improper material selection
- Missing edge restraints
- DIY installations without drainage planning
Avoiding these mistakes from the start saves significant time and money.
When to Hire a Professional Hardscaping Contractor
For homeowners searching for pavers installation near me, choosing a qualified professional ensures:
- Proper base engineering
- Long-term structural stability
- Manufacturer warranty compliance
- Reduced repair and maintenance costs
Professional hardscaping services provide value far beyond initial installation.
Frequently Asked Questions
Why do professionally installed pavers last longer?
Because professionals follow precise excavation, base preparation, compaction, and drainage standards.
Is polymeric sand necessary?
Yes. Polymeric sand significantly reduces movement, weeds, and erosion.
Can large pavers shift more easily?
Large-format pavers require stronger bases and precise installation to prevent movement.
Is repairing shifted pavers expensive?
Repairs can be costly if the base must be rebuilt, which is why proper installation is critical.
Conclusion: Invest in Stability, Performance, and Peace of Mind
Preventing paver shifting is not about shortcuts—it’s about professional-grade installation backed by experience and proven methods. From excavation and base construction to edge restraints, polymeric sand, and drainage, every step matters.
For homeowners with an established budget, partnering with a trusted hardscaping contractor ensures your investment delivers lasting beauty, safety, and performance. When installed correctly, pavers become a durable, low-maintenance feature that enhances your outdoor living space for decades.